Start typing in the search bar to see suggestions.
Ubiqod Interfaces
What is an interface?
Standard QR codes (QODs) and Ubiqod Key
For QODs and Ubiqod Key, an interface defines what will happen when the user scans the QR code with a smartphone.
Interface examples
You can scan the following QR codes to discover examples of interfaces you can create with Ubiqod:
QR code interface for customer survey

Checklist App for QR code

Single choice interface

Clocking interface for QR codes

Interface examples
You can click on the following buttons to discover examples of interfaces you can create with Ubiqod:
QR code interface for customer survey
Checklist App for QR code
Single choice interface
Clocking interface for QR codes
How to create a clocking in interface for QR code in one minute with the Ubiqod builder
Connected devices (IoT)
For connected devices, the interface provides a way to add metadata to the different type of events. For instance, you can add a label and a reference to a button of Smilio A.
Available interfaces for standard QR codes (QODs) and Ubiqod Key

Feedback
The feedback interface is useful to collect customer feedback. With custom redirections, you can redirect the user to a custom web page of your choice depending on the level of satisfaction.
When a feedback is sent, 2 actions are completed:
An email will be sent to the users of the account (you can deactivate it in the account settings)
Data will be sent through the dispatches, if dispatches were added
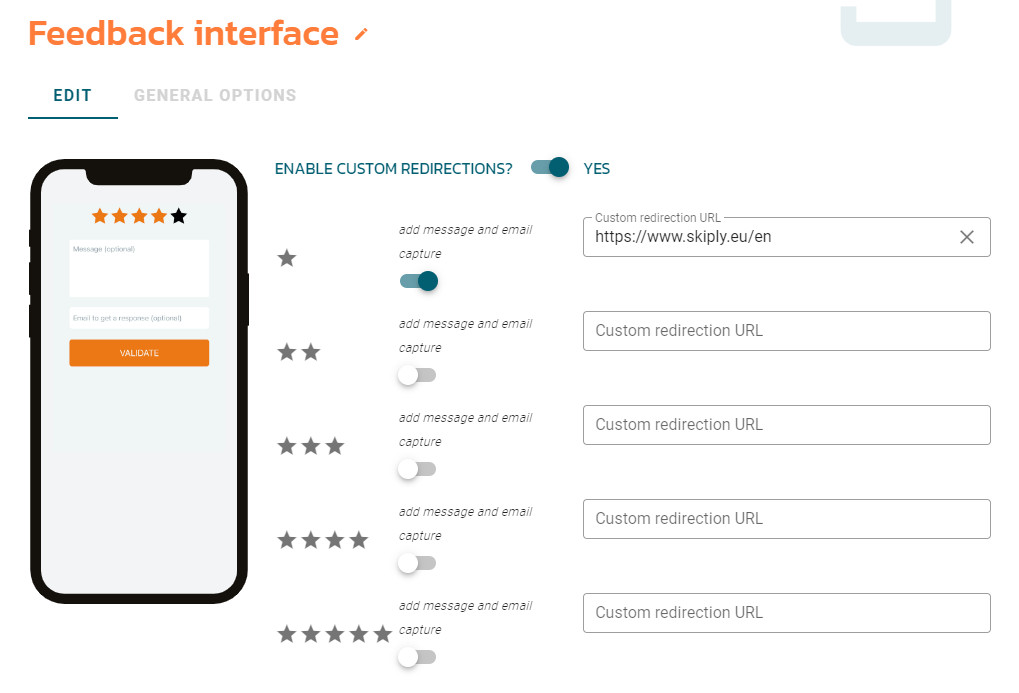
Custom redirections
If you don’t activate custom redirection, users will be redirected to a thank you page promoting Ubiqod.
Add message and email capture
When activating this option, customers will have the possibility to leave a message and an email.
General options
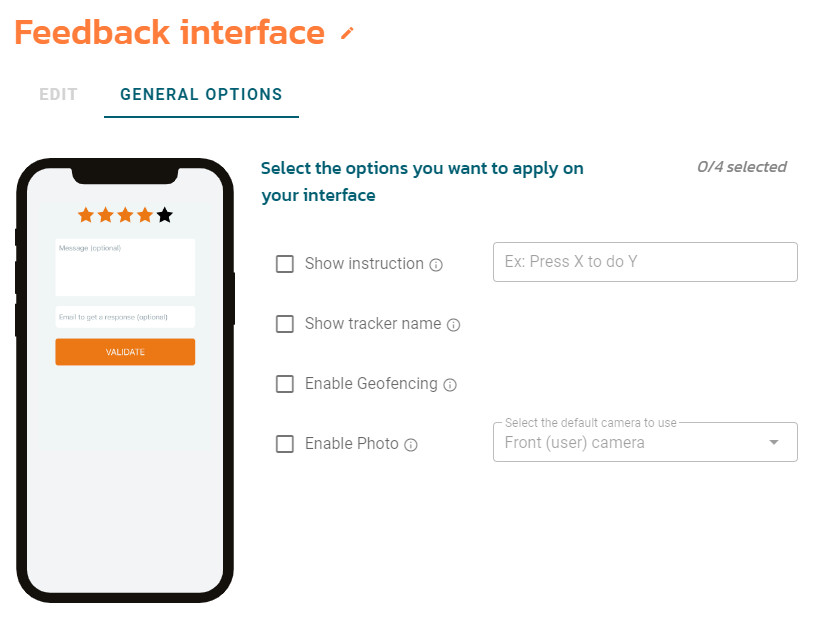
Show Instruction
If you activate this option, the message will be displayed at the top of the screen (below the Tracker Name if checked).
Show tracker name
Show the tracker name on top the page as a title.
Enable geofencing
Geofencing can be used to ensure that a user is at the expected location. Requests user consent (authorization will be requested the first time a user will scan the code).
Enable Photo
Allow the user to add a picture to its feedback. You can choose the camera to be used and force the photo resolution depending on your use case.
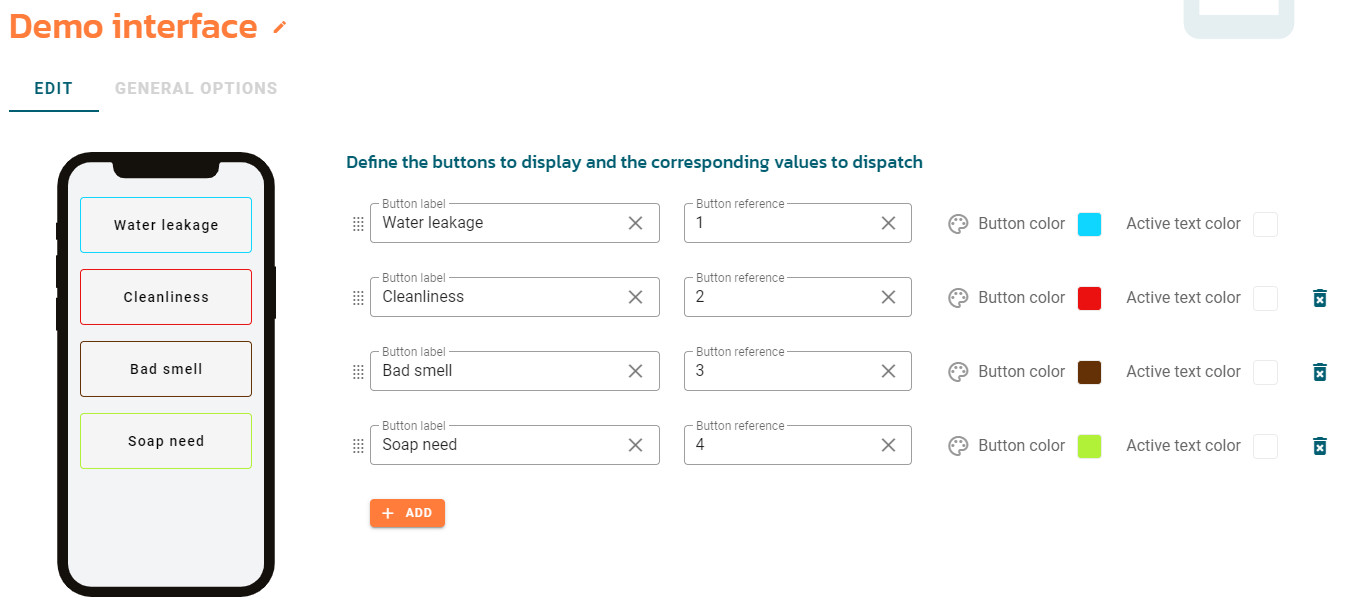
Single Choice
With the single choice interface, you can add up to 6 buttons to let the user make a choice. As soon a button is pressed, the user is redirected to the next step (depending on the activated options).
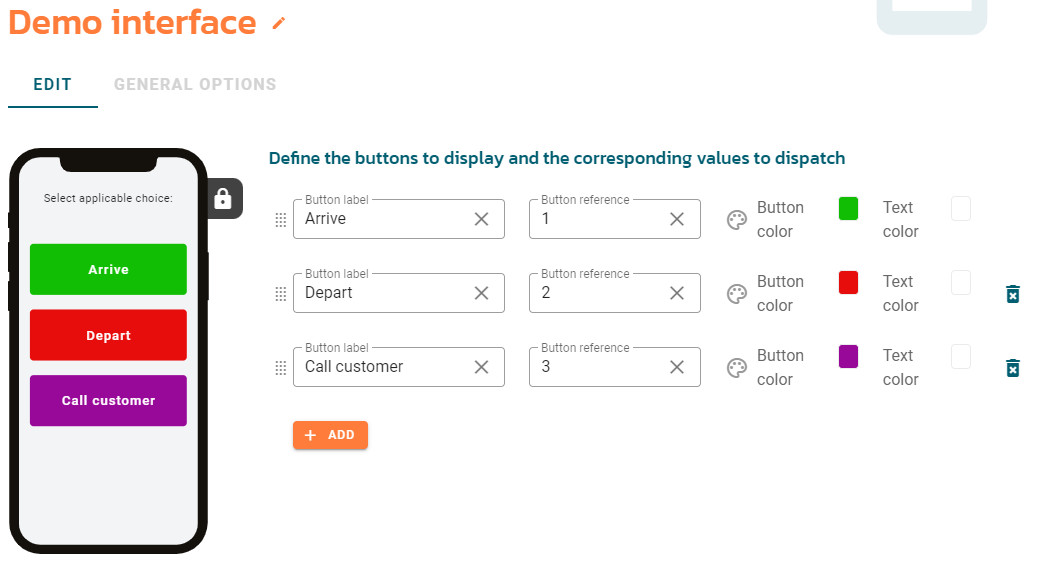
Adding choices
To add choices, press the + ADD button.
The Label is a text that can be used later to identify the action.
The reference is a number. For most use cases, using the reference is a safer way to proceed. If you use the reference, changing the label won’t impact your final app.
You can use the color options to make your screen more pleasant.
General options
Show Instruction
If you activate this option, the message will be displayed at the top of the screen (below the Tracker Name if checked).
Show tracker name
Show the tracker name on top the page as a title.
Enable geofencing
Geofencing can be used to ensure that a user is at the expected location. Request user consent (authorization will be requested the first time a user will scan the code).
Enable Photo
Allow to user to add a picture to its feedback. You can choose the camera to be used and force the photo resolution depending on your use case.
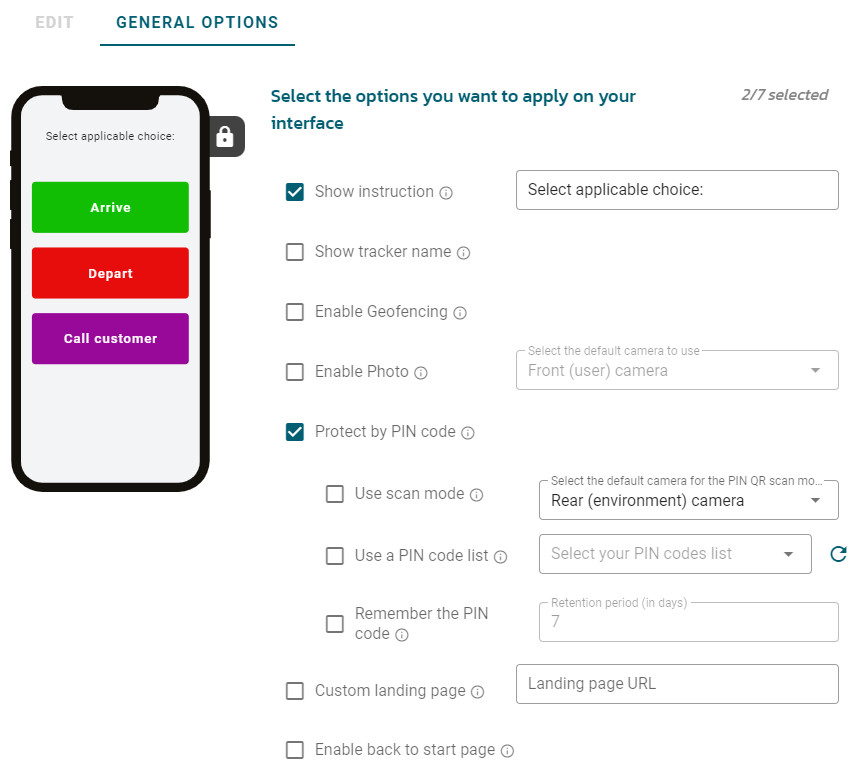
Protected by PIN code
With the PIN code feature, you can identify the people on site or secure access to your interface.
By default, this code is entered manually by the user, but you have several options to facilitate the entry.
Use scan mode (QR code ID badge)
With the scan mode, you can use the camera of the user smartphone to scan a personnal ID QR code (this code is generated by the platform in the corresponding PIN code list, but you can generate your own QR code encoding a ID number).
Use a PIN code list (Map a code with a label)
If you created a PIN code list, you can associate it with the interface. This is usefull if you need to do a mapping between an ID number and a name, or an ID number with an external reference.
Remember a PIN code (ID associated with a smartphone)
When you activate this option, the code will be remembered by the smartphone of the user for the duration you want. This will accelerate the process and avoid cheating in many cases.
Do not use this option when multiple users use the same smartphone.
Custom landing page
This option will redirect the users to a dedicated landing page of your choice after the submission process.
You need to enter a valid URL first in order to activate it.
You can send the tracker slug as a url parameter if you want to use it in a form or to make a dynamic display based on this.
Enable back to start page
This option is useful for 2 specific use cases:
When you want to use a fix devices like a tablet that can be shared by multiple users
When someone have to scan the QR code badges of users with a smartphone
In both case, when a submission is made, the system automatically goes back to the start page in order to scan the next user.
Multiple Choice
The multiple choice interface allow the user to select multiple actions. It will trigger one action per choice selected on the dispatch.
General options: same as single choice
Digit
The digit interface let the user enter a numerical value.
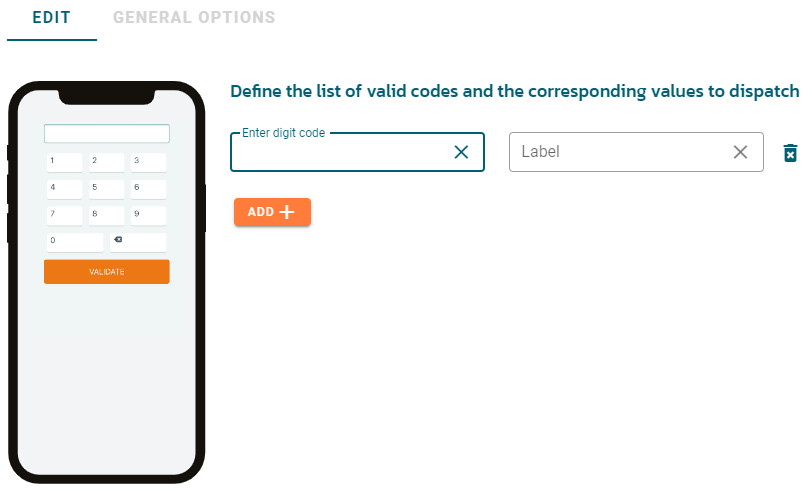
If you don’t provide a list of codes, the number entered will be send as reference, with a blank label.
General options: same as single choice
Redirection (using your own interface)
If you prefer using your own interface when user scans a QOD or Ubiqod Key, you can use the redirection feature. The user will be redirected to your page alongside with dynamic parameters:
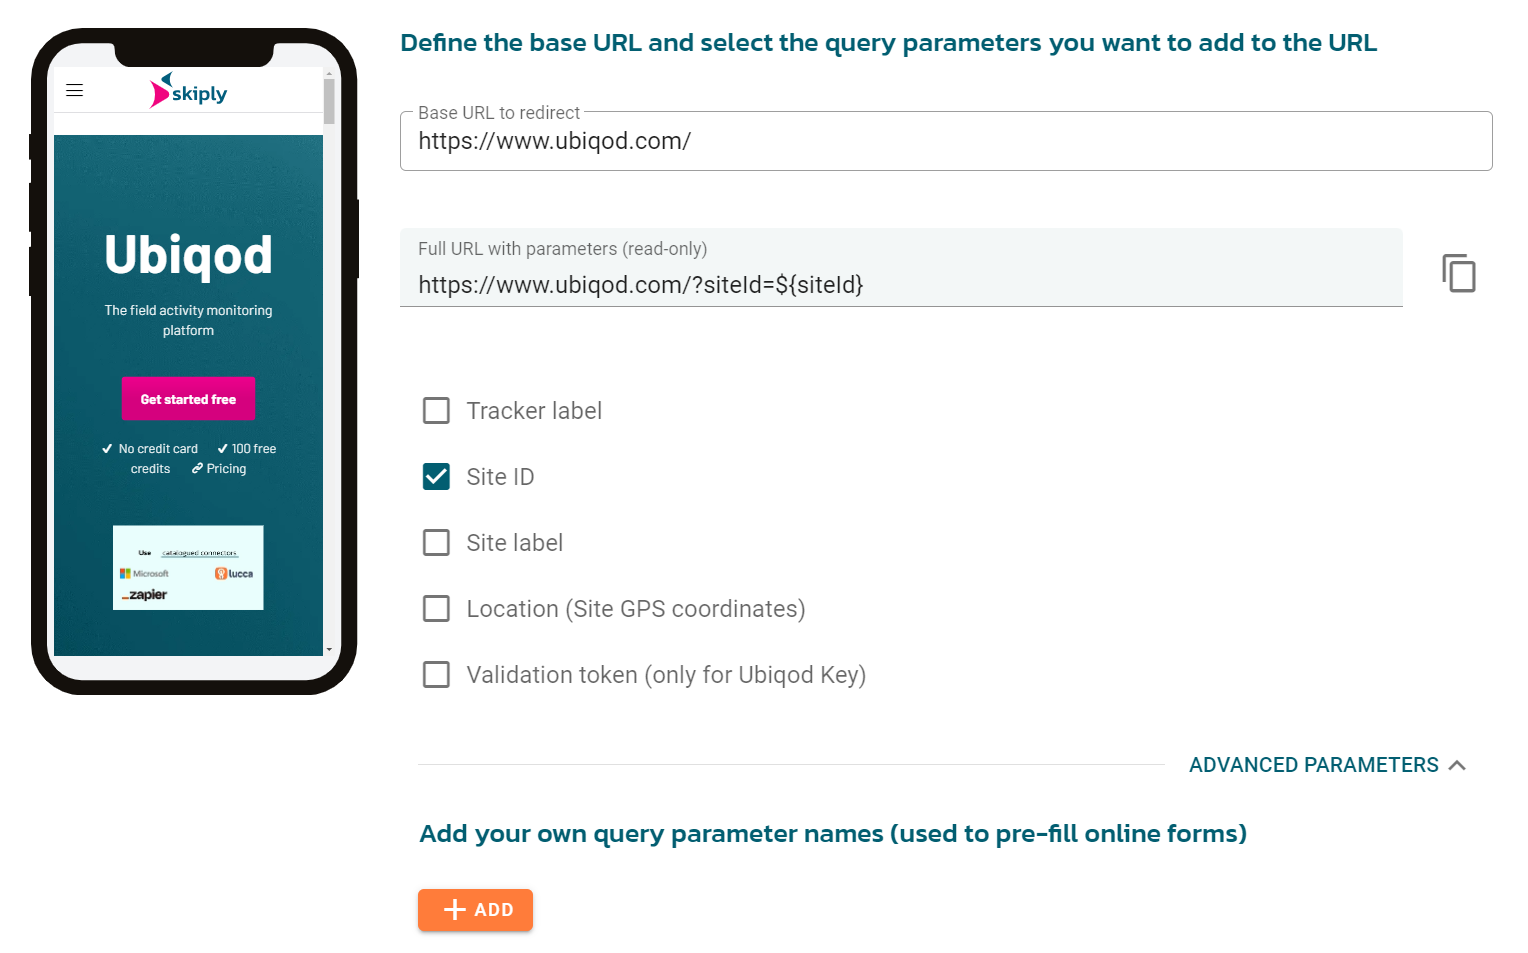
You can use the validation token of Ubiqod Key to secure a form (in combinaison with the token validation API endpoint).
Available interfaces for connected devices (IoT)

If you don’t provide an interface, the label of the actions will be void. Configuring an interface for a device will let you add a custom label for each action.
Smilio A, Smilio S and Smilio E
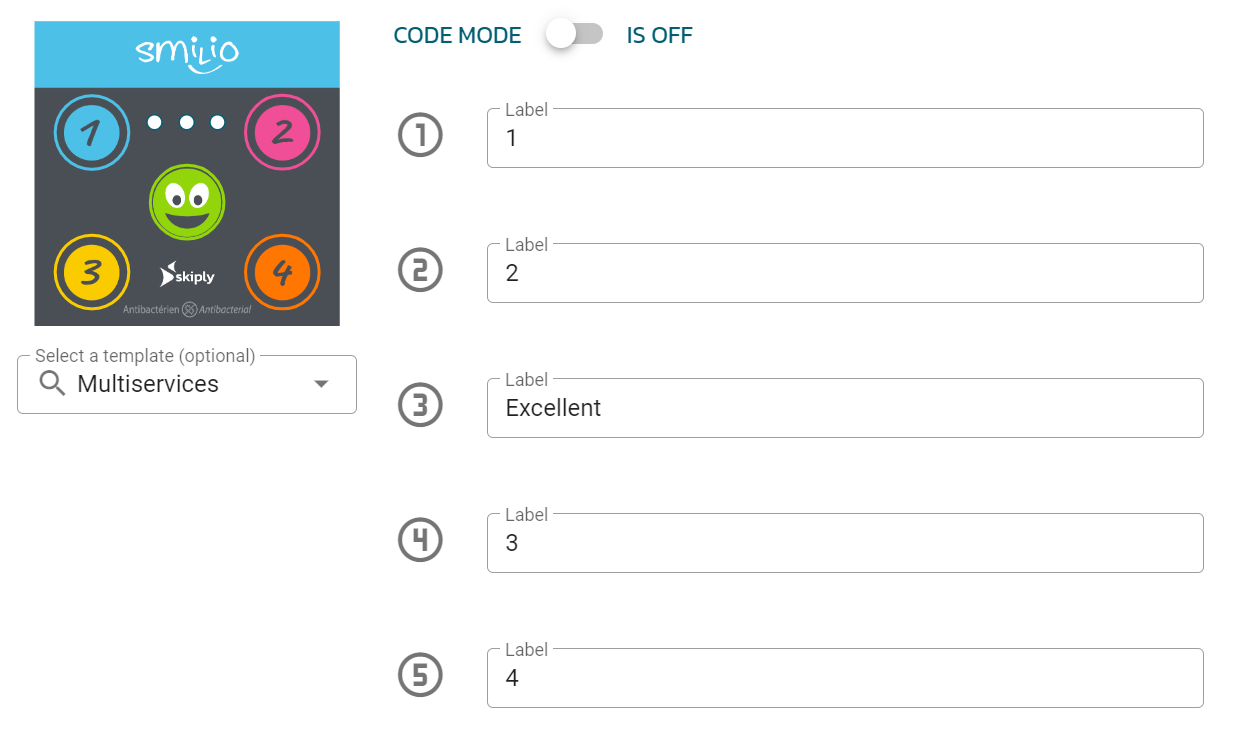
If you activate the code mode, multiple button press will be interpreted as a single code. If not, each button will be considered as separate actions.
Clock S and Clock ST (old product)
You can associate a badge list to the interface.
Clock R
The first action is triggered when a badge is detected. The second action is triggered when the badge is not detected anymore.
You can associate a badge list to the interface.